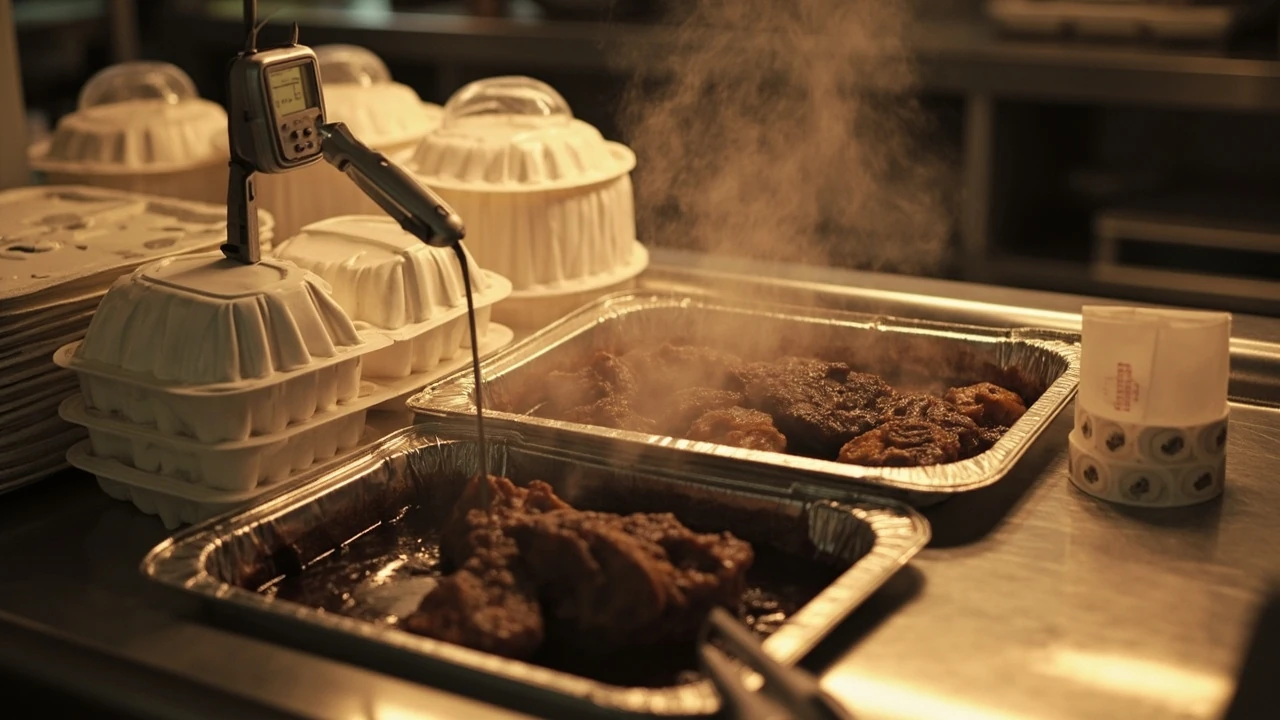
Restaurant takeout packaging checklist for hot food
The first container a guest touches shapes their entire impression of the meal, and for hot food that impression forms in the parking lot. Steam fogs a clamshell, a soup lid pops, a curry soaks through a paper bag, and the guest starts their meal negotiating with the packaging instead of enjoying it. A working restaurant takeout packaging checklist for hot food is the difference between a confident reheat at home and a disappointed text the next morning.
This guide walks through the containers, lids, insulation, venting, and quality-control checks that an operator can audit in a single service. It is built for the owner who already has a pass to manage, a line to feed, and a delivery driver waiting, not for a packaging engineer with a lab. The goal is practical: every hot item leaves the kitchen at the temperature and texture you intended, and every cost line on the packaging order is justified by a real problem it solves.
What “hot food packaging” actually has to do
Hot food packaging carries four jobs at once, and every choice on the checklist should answer at least one of them. When a container fails a job, the failure shows up as a complaint, a refund, or a quietly lost regular.
- Hold heat long enough to survive pickup, the courier handoff, and the ride home without dropping below the temperature where the dish falls apart.
- Resist leaks and grease from sauces, melted cheese, and natural juices that release as food rests in a closed container.
- Manage steam so vapor can escape without drying out the protein or fogging the lid into a soggy mess.
- Protect the food mechanically during stacking, courier transport, and the moment the bag gets set on a car seat or a kitchen counter.
Containers that handle one job well often fail another. A tight-sealing clamshell traps steam and wets the breading. A vented clamshell lets heat pour out the top. The checklist below treats those trade-offs as design decisions, not as quirks to live with.
Start with the menu, not the catalog
The fastest way to overspend on packaging is to shop a supplier catalog before you have grouped the menu. A useful first pass is to sort every hot menu item into one of four behavior groups, because each group points to a different container family.
| Menu group | Typical dishes | Packaging stress | Primary container family |
|---|---|---|---|
| Saucy braises and curries | Beef stew, tikka masala, chili, ragù | Liquid at rest, long hold times | Poly-coated paper tubs with locked lids |
| Fried and crisp items | Wings, fried chicken, tempura, croquettes | Steam softening the crust | Vented clamshells or open-top boxes with side vents |
| Broths, soups, and stews | Phở, ramen to go, French onion, bisque | Boiling-hot liquid, splash risk | Paper soup tubs with dome lids and handles |
| Roasts, planks, and sides | Half chicken, lasagna, mac and cheese, rice | Heat retention and surface browning | Foil pans, oven-safe CPET trays, or rigid plastic |
Grouping the menu this way turns a catalog of forty SKUs into three or four container decisions. It also makes the line of sight between the dish and the box obvious, which is what the guest notices when they open the bag.
The core checklist, item by item
The list below is the working checklist used during a service audit. Each item links to a specific failure mode the team has either seen or can reasonably predict. Run through it before placing a packaging order and again after the first full week of service on a new container.
- Heat tolerance of the container. Confirm the rated temperature range covers both the fill temperature from the pass and the worst-case hold time. CPET trays rated to 400°F handle oven finishing; polypropylene clamshells warp around 220°F.
- Lid fit under load. Press the lid on a filled container and then tilt it 30 degrees over a tray. If liquid beads at the seam, the lid is decorative, not functional.
- Steam venting that you control. Vents should be small enough to release vapor, large enough to prevent a pressure pop, and placed away from the path the courier will lay the bag. Pre-cut vent holes beat hand-slashing lids, which also weakens the seal.
- Grease and sauce resistance. A 30-minute contact test on the inside surface catches the failures that only show up on a long delivery. Poly-coated paper and PET both outperform plain kraft for saucy items.
- Stack strength with food inside. A container can be rigid empty and pancake under a full bag. Check sidewall flex with a loaded box before approving a SKU.
- Reheat safety for the guest. If the dish is meant to be reheated, the container should move from bag to oven or microwave without a transfer step. Guests rarely wash a second dish to reheat a takeout order.
- Insulation, not just the container. A correct container inside a thin bag will still cool fast. Pair every hot item with an insulated bag, and size the bag so the container is snug, not loose.
- Sealing and tamper evidence. A tamper-evident sticker or a heat-sealed film is also a temperature seal. It slows the steam loss that drops surface temperature fastest.
- Stacking and orientation rules for the line. Decide which container goes on top of which, and write it on the expediter station. Sauces on the bottom, fry boxes upright, soups on the side, never stacked.
- Cost per order, not cost per unit. A ten-cent soup tub that prevents one refund a week pays for itself across a quarter. Track packaging cost against the order, not the piece.
Heat retention, in numbers an operator can use
Hot food cooling is governed by the same physics whether it is on a plate or in a clamshell, and a few reference points make the choices on the checklist easier to defend. Food safety guidance commonly targets holding hot food above 140°F (60°C) to limit the window in which bacteria multiply quickly, and the U.S. Food and Drug Administration’s food code treats that range as a benchmark for hot holding. A container that drops below that line during a 25-minute delivery has failed the job even if the lid never popped.
For practical purposes, think in three bands:
- Above 160°F at handoff. The container is doing its job and the food will arrive safely hot, even with a slow courier.
- 140-160°F at handoff. Acceptable for short trips, but the food needs an insulated bag and tight stacking to hold the temperature through the ride.
- Below 140°F at handoff. The order is at risk. Either re-engineer the container, add insulation, or shorten the delivery radius.
Those bands are not regulations to enforce on every order, but they give the expediter a reason to refuse a handoff. A container that looks fine but reads 130°F on the pass thermometer is not actually fine.
Venting: the most misunderstood line on the checklist
Vents are where the four packaging jobs collide. Too little venting and steam condenses on the lid, then drips back into the food and ruins the texture of anything crispy. Too much venting and the container becomes a heat chimney that drops the food into the danger zone before the guest opens the bag.
| Food type | Venting strategy | What to avoid |
|---|---|---|
| Fried items | Two to four small side vents near the corners | Sealed lids that trap steam and soften the crust |
| Stews and saucy curries | Tight lid, no vent, sauce held separately if possible | Vents over a liquid pool, which turn into leak paths |
| Roasted vegetables | Modest venting to release vegetal moisture | Sealed containers that turn the veg into a braise |
| Baked pasta and rice | No vent, tight lid, brief rest before sealing | Sealing while the surface is still steaming hard |
| Soups and broths | No vent, dome lid, sealed film over the rim | Any vent at all, which will splash during transit |
The line cook’s instinct to lid everything tightly is correct for soups and stews and wrong for fried food. The checklist makes the decision explicit so it does not depend on who is working the pass that night.
Leak control without losing heat
Leaks are the single most common takeout complaint, and the fix is almost never “buy a better lid.” The fix is matching container geometry to the food, and giving sauces their own compartment so they cannot reach the seam. A few rules of thumb from real services:
- Leave headroom for steam expansion. A soup tub filled to the brim will pop its lid on a hot summer delivery. Fill lines drawn on the inside of the tub keep the portion consistent.
- Separate wet from dry. A small sauce cup clipped into the lid, or a sidecar tub, keeps a fried item crisp and the sauce intact without needing a heavier container.
- Use the right film for the right container. Poly-coated paper and CPET trays take heat-seal film cleanly; polypropylene clamshells do not. Mismatched films look sealed and then fail in the bag.
- Double-bag only the orders that need it. A bag inside a bag is a useful leak control for soup but a heat trap for a stir-fry. Decide per menu group, not per order.
Insulation that actually earns its cost
An insulated bag is not a luxury add-on; it is part of the container system. A thin poly bag is fine for a 10-minute walk to a pickup window and a failure for a 25-minute delivery across town. The decision is which insulation level matches the order mix, not which one is on sale.
| Service pattern | Insulation choice | Why it fits |
|---|---|---|
| Walk-up pickup only, under 10 minutes | Single-wall paper bag, no foil liner | Short hold time, low cost per order |
| Curbside pickup, 10-20 minute waits | Foil-lined bag with a tuck flap | Reflects radiant heat during a wait on a hot curb |
| Third-party delivery, 20-40 minutes | Insulated courier bag with closed-cell foam | Slowest leg of the trip, biggest heat loss |
| Catering or multi-dish orders | Rigid catering box with hot pack | Multiple items held together at safe temperature |
Hot packs are worth the line item if the menu regularly hits a 25-minute delivery window. A reusable hot pack pre-conditioned in a proofer will hold a container above 150°F for the full window, which is also the temperature band where most hot food still tastes like itself. For broader context on how heat moves through insulated systems, the thermal insulation overview is a useful primer.
Container materials, without the marketing
Suppliers will pitch every material as the right answer. The right answer depends on the dish, the hold time, and the disposal stream the city expects. A short, honest comparison helps an operator push back on a catalog page.
- Poly-coated paper. The workhorse for saucy dishes and soups. Holds heat well, accepts hot food, recycles in many municipal streams if the food residue is reasonable. Will go limp on very long holds if the sauce is acidic.
- CPET (crystallized PET). The best hot-and-reheat container. Oven-safe to about 400°F, rigid, leak-resistant. Heavier and more expensive, and not always accepted in curbside recycling.
- Polypropylene clamshells. Light, clear, cheap, and the wrong tool for very hot food. They warp, they vent poorly, and they look bad when fogged. Best for cold or warm items where presentation matters more than heat.
- Aluminum foil pans. Excellent heat conduction and oven-safe, but they lose heat fast by radiation and they dent in a courier bag. Best under a lid or inside an insulated box.
- Molded fiber (bagasse). The growing “eco” choice. Handles heat and grease well, composts in industrial facilities, but varies in lid fit between production runs. Sample every shipment before approving.
The material choice is rarely the cause of a takeout complaint on its own. The cause is almost always a material placed in a service pattern it was not designed for, like a polypropylene clamshell asked to hold a 200°F braise for 30 minutes.
The expediter’s quality-control pass
Even a perfect container fails if the line fills it wrong. A 30-second quality-control pass at the expediter station catches most of the problems that turn into refunds. Run the same checklist for every hot order, in the same order, and the team will not have to think about it after a week.
- Temperature spot check. Probe one in ten hot orders. If the reading is below 160°F, hold the order for 60 seconds under the heat lamp and recheck.
- Fill level. Soup tubs to the marked line, not the rim. Stir-fry boxes mounded but not over the vent holes.
- Lid seal. Audible click or visible seal. Press the corners; do not trust the middle.
- Sauce and sidecar placement. Wet components clipped, capped, or in their own bag. Never loose in the main container.
- Bag pairing. Hot bag, not the generic takeout bag. Insulated bag for delivery, lined bag for curbside, plain bag for walk-in.
- Stacking order. Sauces on the bottom, soups upright, fried items on top where the courier will not set a second bag.
- Label and ticket match. The name on the bag matches the ticket, and the count of containers matches the count on the ticket.
The pass takes longer the first week and then becomes a rhythm. Operators who skip it almost always discover the same problem twice before they fix it.
Cost math that holds up to a quarterly review
Packaging is one of the few line items a restaurant can renegotiate every quarter, and it is also one of the easiest to overspend on while still losing money to refunds. A simple framework keeps the conversation honest when a cheaper catalog shows up in the inbox.
| Cost driver | What to measure | What good looks like |
|---|---|---|
| Cost per order | Packaging spend divided by takeout orders, weekly | Stable or trending down while complaint rate is also stable or down |
| Refund rate | Refunds tied to packaging, not to taste or service | Under 1% of takeout orders once the checklist is in place |
| Container damage | Cracked or warped containers per 100 orders | Low single digits, with a clear log of supplier batches |
| Reorder frequency | Orders placed per month for each SKU | Aligned to forecast, no emergency orders in the last 30 days |
| Storage footprint | Linear feet of packaging in the dry store | Two SKUs per menu group maximum, no orphan cases |
Run the same numbers before and after any change. A switch to a slightly cheaper container that adds half a percentage point to the refund rate is not actually a saving, and a switch to a more expensive container that cuts refunds by two points is usually a clear win. For an external view on the broader economics of running a takeout program, the U.S. Small Business Administration guide to running a business has useful framing on cost control that translates well to a small operator.
Common failures and what they actually mean
When a complaint lands, the container is usually the messenger, not the cause. Reading the complaint correctly saves a re-order and a refund.
- Soggy fried food. Almost always a venting problem or a lid sealed too early. Fix the vent pattern, hold the fried item two minutes under the heat lamp before lidding.
- Curry leaked through the bag. Headroom problem or a fill line that nobody marked. Add the line, retrain the portioner, and recheck the lid fit.
- Soup arrived cold. Either the container is right and the bag is wrong, or the container is the wrong family. Soup needs a paper tub with a dome lid plus an insulated bag, full stop.
- Container collapsed in the bag. Stack strength failure. Test every new SKU with a loaded drop from counter height before approving.
- Food smells like the container. Material problem or temperature problem. Polypropylene at high heat can off-flavor; switch to CPET or paper.
Each of these has a one-line fix that goes on the checklist, which is the point. A takeout program that learns from one complaint at a time eventually writes its own checklist. The version here is just a faster start.
Sustainability, without the slogans
Sustainable packaging is real, but it is a constraint set, not a marketing line. The honest questions are whether the container composts in a facility the guest can actually reach, whether the lid is the same material as the base, and whether the production process tolerates hot fill. A molded fiber clamshell that fails the leak test is not a sustainability win; it is a refund.
For orientation on the broader category and its terminology, the food packaging overview is a reasonable starting point, and the link in the next paragraph points to a deeper read on operating takeout well. Two practical moves earn the most ground per dollar: standardize to a small number of SKUs so the city recycling stream can actually process them, and switch one menu group at a time so the line can adapt.
Operators who want a fuller read on how takeout fits into a growing restaurant business can step into the related food delivery setup guide on the same site, which covers the order-flow side of the same problem. For a wider look at how packaging and brand voice work together, the food photography guide explains why the container is also part of the photo when the dish lands on social.
Putting the checklist into service
The fastest way to make this checklist real is to print the ten core items, tape them to the expediter station, and run them for a single service. The team will mark up the list with the failures they actually see, which is more useful than any catalog. After a week, the marked-up list becomes the operational checklist and the printed version gets retired.
Re-run the audit every quarter, after any menu change, and after any switch in delivery radius. Packaging that worked for a five-block delivery radius will fail at fifteen blocks, and a menu that added a new braised dish will need a new container family. The checklist stays useful only if it changes with the operation, which is also the point of writing it down in the first place.
A restaurant takeout packaging checklist for hot food is not a one-time project. It is a small, durable system that keeps a hot dish tasting like it left your kitchen, even after it has spent half an hour in someone else’s car.
Frequently asked questions
What is the single most important item on a restaurant takeout packaging checklist for hot food?
Lid fit under load. A container that passes a visual check and fails a tilt test will leak in the bag, and a leaky bag drives refunds faster than any other packaging problem. Test every new lid with a filled, tilted container before approving a SKU.
How hot should food be when it goes into the takeout container?
Above 160°F at the pass is a strong working target for most hot dishes. That gives the container enough thermal headroom to survive a 20-30 minute delivery while staying above the 140°F band where hot food safety and quality both suffer.
Do I really need an insulated bag for every takeout order?
For walk-in pickup under 10 minutes, a paper bag is usually enough. For curbside pickup and any third-party delivery, an insulated bag pays for itself by holding the food in the safe and tasty temperature band longer. The longer the delivery window, the more the bag matters.
Are vented clamshells better than sealed ones for hot food?
Neither is universally better. Vented clamshells are right for fried and roasted items where steam would otherwise sog the crust. Sealed containers are right for soups, stews, and saucy curries where a vent becomes a leak path. Match the vent strategy to the menu group.
What container material is best for reheating in a home oven?
CPET trays are the safe default for oven reheating, typically rated to about 400°F. Aluminum foil pans also work but lose heat faster once out of the oven. Polypropylene clamshells and most poly-coated paper containers are not designed for oven use.
How do I stop fried food from going soggy in a takeout container?
Vent the container, hold the fried item briefly under a heat lamp before lidding to drive off surface moisture, and keep sauces in a sidecar cup rather than poured on top. These three changes fix most sogginess complaints without buying a new container.
What is a fair target for packaging cost per takeout order?
There is no universal number, but a useful exercise is to track packaging cost per order against refund rate. If a more expensive container drops refunds by a point or more, the spend usually returns more than it costs. Aim for a stable or falling packaging line item alongside a stable or falling refund rate.
How often should I re-audit the takeout packaging checklist?
At minimum, once a quarter, and any time the menu, delivery radius, or supplier changes. A checklist written for a five-block radius will fail at fifteen blocks, and a new braised menu item will need a new container family even if every other dish is unchanged.
Can I use one container for all hot takeout items?
You can, but you will trade away quality on at least one menu group. Soups, fried items, saucy curries, and roasted sides each stress a container differently. Two or three well-chosen container families usually outperform a single compromise SKU on both quality and cost.
What is the fastest way to test a new takeout container?
Run a small order through the full service. Fill it, lid it, hold it for the longest realistic delivery window, then open and inspect the food. A 30-second lab test in the back of the house catches most of the failures a catalog page will not show you for another quarter.